Management Techniques
Need to learn more about Phragmites management? View a summary of techniques below. Note that there is no single method that is a ‘quick fix’ to manage Phragmites: a multi-method approach may be critical for success and long-term results. View a list of best practices guidelines for more information, and enroll in the Phragmites Adaptive Management Framework to receive specific management guidance for your site!
We need your help!
Some management techniques listed below (e.g., tarping, spading, flooding) have little published supporting data. Do you have a case study that tests these techniques or others that you would like us to showcase? Consider adding your work to the Great Lakes Phragmites Collaborative Case Study page! By adding your work, you can help us and other managers understand the efficacy of different management techniques across a variety of Great Lakes settings. Contact us at phragmites@glc.org!

Cutting underwater
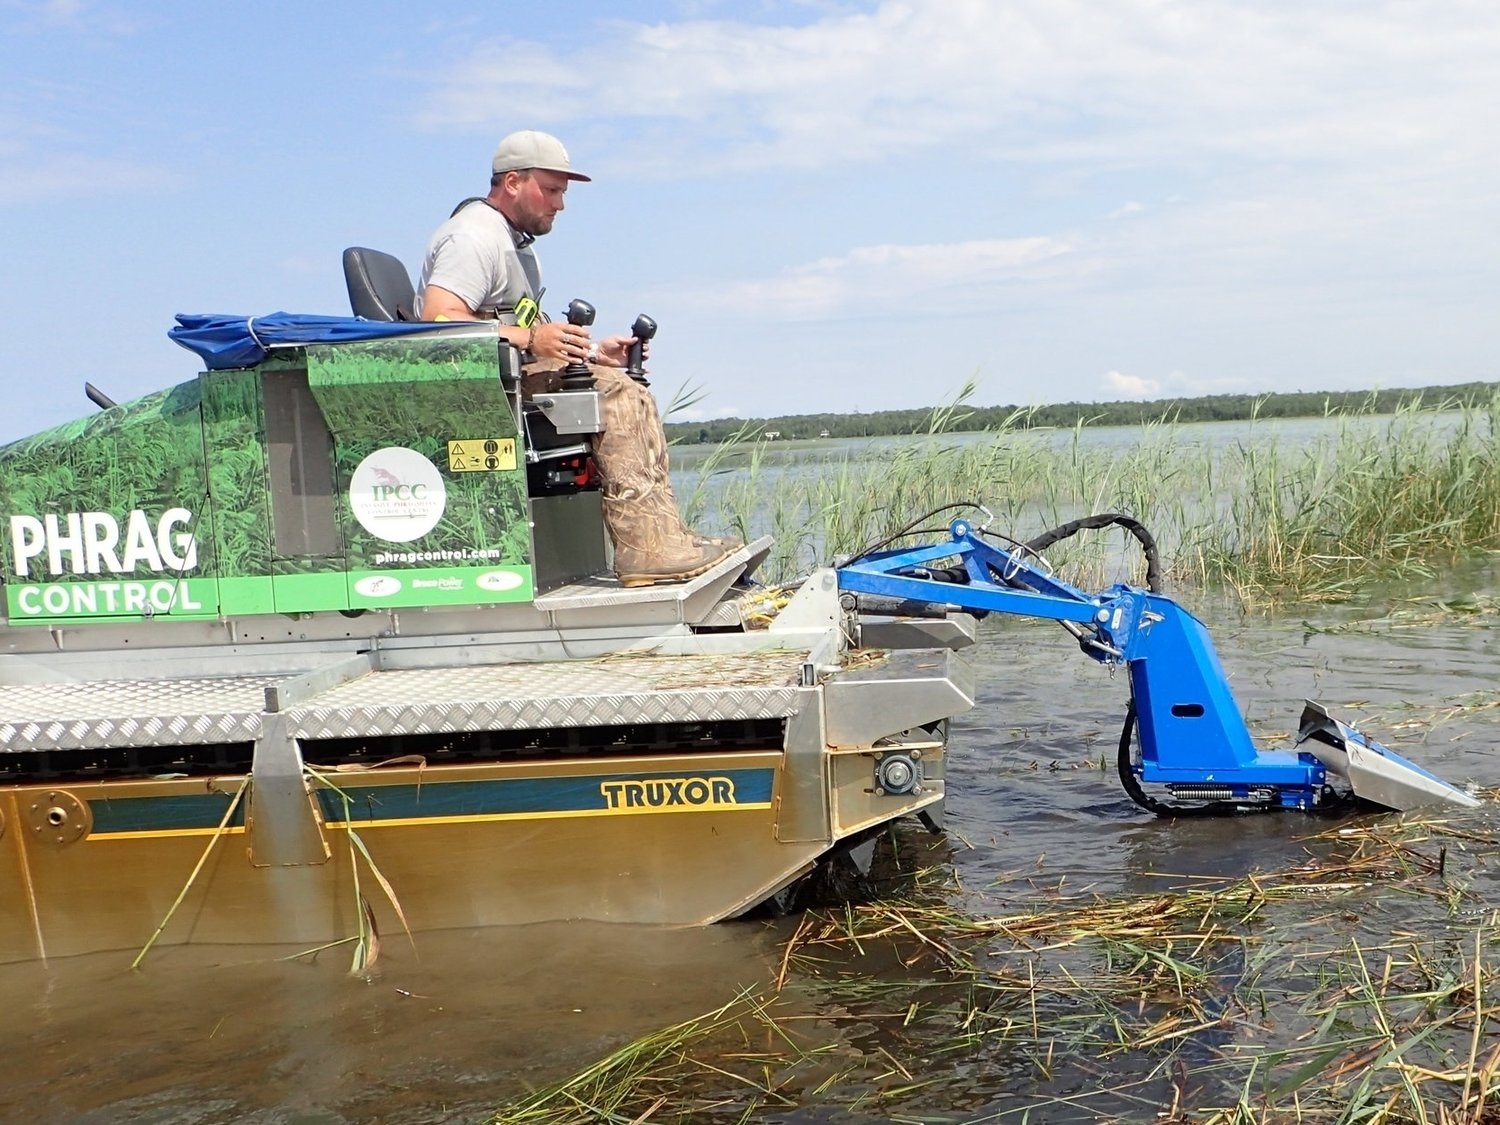
Cutting underwater, also called “cut-to-drown”, is an effective technique used to control non-native Phragmites. Cutting Phragmites below the waterline effectively drowns the plant by cutting off its oxygen supply. While mechanical removal techniques alone are typically insufficient, cutting can be extremely effective in aquatic environments. The reason is simple: plants need to breathe. When Phragmites is completely submerged, the plants become oxygen-starved and drown. However, if any part of the leaf or stem is above water, Phragmites can survive by “snorkeling:” the process of bringing oxygen to the submerged parts of the plant to support critical functions. Cutting underwater is being successfully used at two very different scales: using large, specialized machinery, and manually using hand tools. Multiple rounds of cutting may be necessary to fully eradicate areas, especially if the site is densely populated with Phragmites. Any stems cut should be collected and removed from the management area. Checking on managed sites yearly and cutting any new growth is the best way to ensure the sites stays Phragmites free! Cutting underwater is one of many management techniques included in the Phragmites Adaptive Management Framework (PAMF).
Continue Reading
Timing
Cutting underwater is most effective during the Phragmites growing phase (mid-spring to late summer) and translocation phase (late summer to mid-fall). During this period, the plant needs oxygen to grow and transfer sugars belowground to its extensive root network called rhizomes. Thus, cutting the stems underwater depletes the plant of its oxygen supply and starves the plant. For this reason, cutting underwater is not effective when Phragmites is in the dormant phase (late fall to mid-spring) and is not actively transferring nutrients between its aboveground biomass and rhizomes.
Are there other management techniques used with this one?
Cutting underwater is generally not combined with other management techniques. If you do not have the tools to cut Phragmites underwater but are able to manipulate water levels, flooding gives similar results.
Special equipment needed
The cut-to-drown technique can be implemented by hand (using tools like raspberry cane cutters or brush cutters) or with large, amphibious machinery or harvesters (e.g., Truxor). Large, specialized machines have been developed or adapted to cut vegetation underwater. Phragmites managers who have funding to purchase or rent this equipment may find it particularly useful in cutting shorelines or very wet areas that are otherwise difficult to reach. Hand-held tools can also effectively cut Phragmites below the waterline. For small areas or where funding is limited, this approach can be used by crews of staff or volunteers. Once the area has been mowed or cut, stems should be collected and disposed of properly to prevent further spread.
Special considerations
Make sure to look into whether permits are required for cutting in your area. Do not leave cut stems in water. Cut Phragmites stems can quickly put out new shoots and roots from their nodes, allowing the plant to re-establish. All cut material should be properly disposed of following the rules of your local jurisdiction. Stems should be cut to as close to the sediment as possible or at least 6 inches below the water’s surface to avoid “snorkeling” stems.
Resources
- Brochure: Using hand tools to cut Phragmites (see pages 3&4)
- Story Map: Read more about USGS’s work on optimizing the cut underwater method in the Great Lakes basin and use the interactive map to see how lake levels effect expansion and management of Phragmites
- Tips/Tricks: The Georgian Bay Wetlands and Shoreline has great tips and preparation advice for cutting underwater
- GLPC Webinar: Taking advantage of high water levels to control invasive Phragmites along the Lake Huron shoreline by Dr. Janice Gilbert
- Case study: Mapping and Removal of Phragmites australis along Western Collingwood Shoreline through Community Action and Local Partnerships
- Case Study: Manual control of Phragmites australis in freshwater ponds of Cape Cod National Seashore, Massachusetts, USA
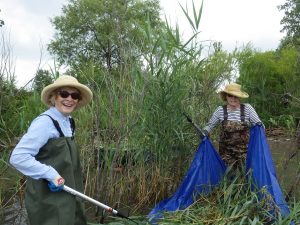
Using hand tools to cut Phragmites under water. Photo: IPCC.
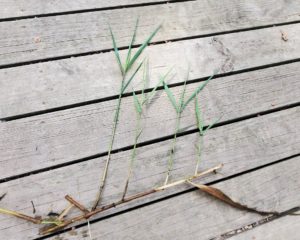
A broken Phragmites stem putting out new shoots in response to being in water. Photo: Taaja Tucker, USG
Herbicide
Herbicide application is the most common Phragmites management technique in North America and is utilized by 94% of land managers controlling Phragmites (Martin and Blossey, 2013). In many cases, herbicide is the most effective method of non-native Phragmites management when it is used as part of a comprehensive integrated management approach. Successive treatments of herbicides are necessary for the eradication of Phragmites (Lombard et al., 2012). Click here to view our dedicated page on Herbicide.
For more information on herbicide application, see: A guide to the control and management of invasive Phragmites by the Michigan Department of Natural Resources. For a quick reference guide to appropriate herbicide mixing rates, see the handy Phragmites Treatment Herbicide Quick Guide.
Regulations on the application of herbicides and required permits vary depending on location. Check with local authorities before purchasing and applying herbicides.
Continue Reading
Timing
The application of herbicide is frequently suggested for late summer/early fall which coincides with the end of the growing season through the early translocating phase of Phragmites after flowering has occurred.
Methods used to apply herbicide vary depending on the size of the area requiring treatment, the density of the Phragmites stands, the composition of the surrounding vegetation, and the capacity of the management team. There are at least two herbicides (glyphosate and imazapyr) that are effective at managing non-native Phragmites stands and are commercially available under a variety of brand names in the United States and Canada. These chemicals are not species specific, so care must be taken to avoid harming native plants.
When using herbicide to manage non-native Phragmites, if the entire clone is not killed, the remaining rhizomes may produce new stems the following year. It is likely to see a dramatic decline in Phragmites abundance after one application (Breen et al., 2014), but the stand will likely grow back unless the rhizome structure is fully destroyed. In some cases, Phragmites stems may take the form of a “witches broom” growth in successive years, with many small stems growing from a single node that may be buried or exposed. Resprouting stalks and witches brooms will require follow-up herbicide treatment to prevent the stand from reestablishing. View our blog post on why multiple herbicide treatments are important.
Are there other management techniques used with this one?
Application of herbicide can be more effective if used with other management techniques. Since the preferred time of application is in late summer and early fall it can be effectively paired with prescribed fire treatments in a winter dormant period which may be more effective than herbicide alone (Clark et al. 1998, see blog post in links below). Herbicide treatment can also be paired with other techniques such as spring and early summer mechanical or manual removal. Removal of dead stems may help increase effectiveness of herbicides by allowing for increased exposure of live Phragmites stems and leaves to foliar spray, and increase ease of accessing large and dense stands.
Special equipment
Depending on the method of application and size of the stand the equipment used to apply herbicide can vary. For the largest acre stands of Phragmites aerial spray applications using helicopters or other aerial vehicles may be used with thorough consideration of non-target impacts. For other stands it may be best to use boom and backpack sprayers, and for sites with more sensitive species and desirable native species communities, manual application methods like injecting stems or hand wicking are more precise application methods that may reduce the impact to surrounding species.
Special considerations
Effectiveness of the common herbicides Glyphosate and Imazapyr relies upon correct preparation of concentration and application according to product label and state and local laws. For full effectiveness, care should be taken to prevent broken stems which may prevent herbicide dispersal to the rhizome, increasing the likelihood for the plant to return the next year.
Some resources currently recommend a mixture of Glyphosate and Imazapyr for treatment of Phragmites, and time should be taken to understand the trade-offs between these herbicides and what may work best for your treatment site. For example, Imazapyr remains active in the soil longer than glyphosate, and therefore can have greater non-target impacts if used in areas with greater plant diversity. Care should be taken with proximity to desirable plant species, as non-specific herbicides may have an undesired impact on some species through proximity from spray drift and soil interactions. For information on how herbicide may impact trees or other woody species, check out the resource: Common Landscape Herbicides and Their Effects on Trees (msstate.edu).
Additionally, different chemical formulations are available for application over land and over water. It is important to use the correct formulation for the application site, because overland formulas can harm amphibians, fish, and macro invertebrates (native mussels, aquatic insects, and other invertebrates). ALWAYS use an approved aquatic herbicide for application in wetlands and over water. For more information about herbicide impacts on amphibians and reptiles, see p. 19-20 and 71-72 of the Michigan Amphibian & Reptile Best Management Practices document.
Resources
- GLPC’s Treatment Herbicide Quick Guide
- GLPC Blog: Evaluating Efficacy of Phragmites Treatments on the Western Lake Erie Coastline, herbicide/burn and herbicide/burn/seed
- Factsheet: Common Landscape Herbicides and Their Effects on Trees (Mississippi State
- Quick guide: PennState herbicide Management
- BMP Guide: Michigan Amphibian & Reptile Best Management Practices
- Case Study: Aerial Application with Prescribed Fire
- Case Study: Aerial and Backpack Application with Mechanical Removal
- Scientific Article: Common Reed (Phragmites australis) Response to Mowing and Herbicide Application
- Scientific Article: Clark, Kennedy H. 1998. Use of prescribed fire to supplement control of an invasive plant, Phragmites australis, in marshes of southeast Virginia. Page 140 in Teresa L. Pruden and Leonard A. Brennan (eds.). Fire in ecosystem management: shifting the paradigm from suppression to prescription. Tall Timbers Fire Ecology Conference Proceedings, No. 20. Tall Timbers Research Station, Tallahassee, FL.
- Scientific Article: Martin, L. J., and Blossey, B. 2013. The runaway weed: costs and failures of Phragmites australis management in the USA. Estuaries and Coasts 36:626–632.
- Scientific Article: Lombard, K.B., Tomassi, D., and Ebersole, J. 2012. Long-term management of an invasive plant: lessons from seven years of Phragmites australis. Northeastern Naturalist 19:181–193.
- Scientific Article: Breen, D. B., Bailey, S. D., and Violi, H. A. 2014. Managing remnant and re-emerging Common Reed (Phragmites australis) infestations to improve treatment efficacy and mitigate damage to native plants. Invasive Plant Science and Management 7:445–453.
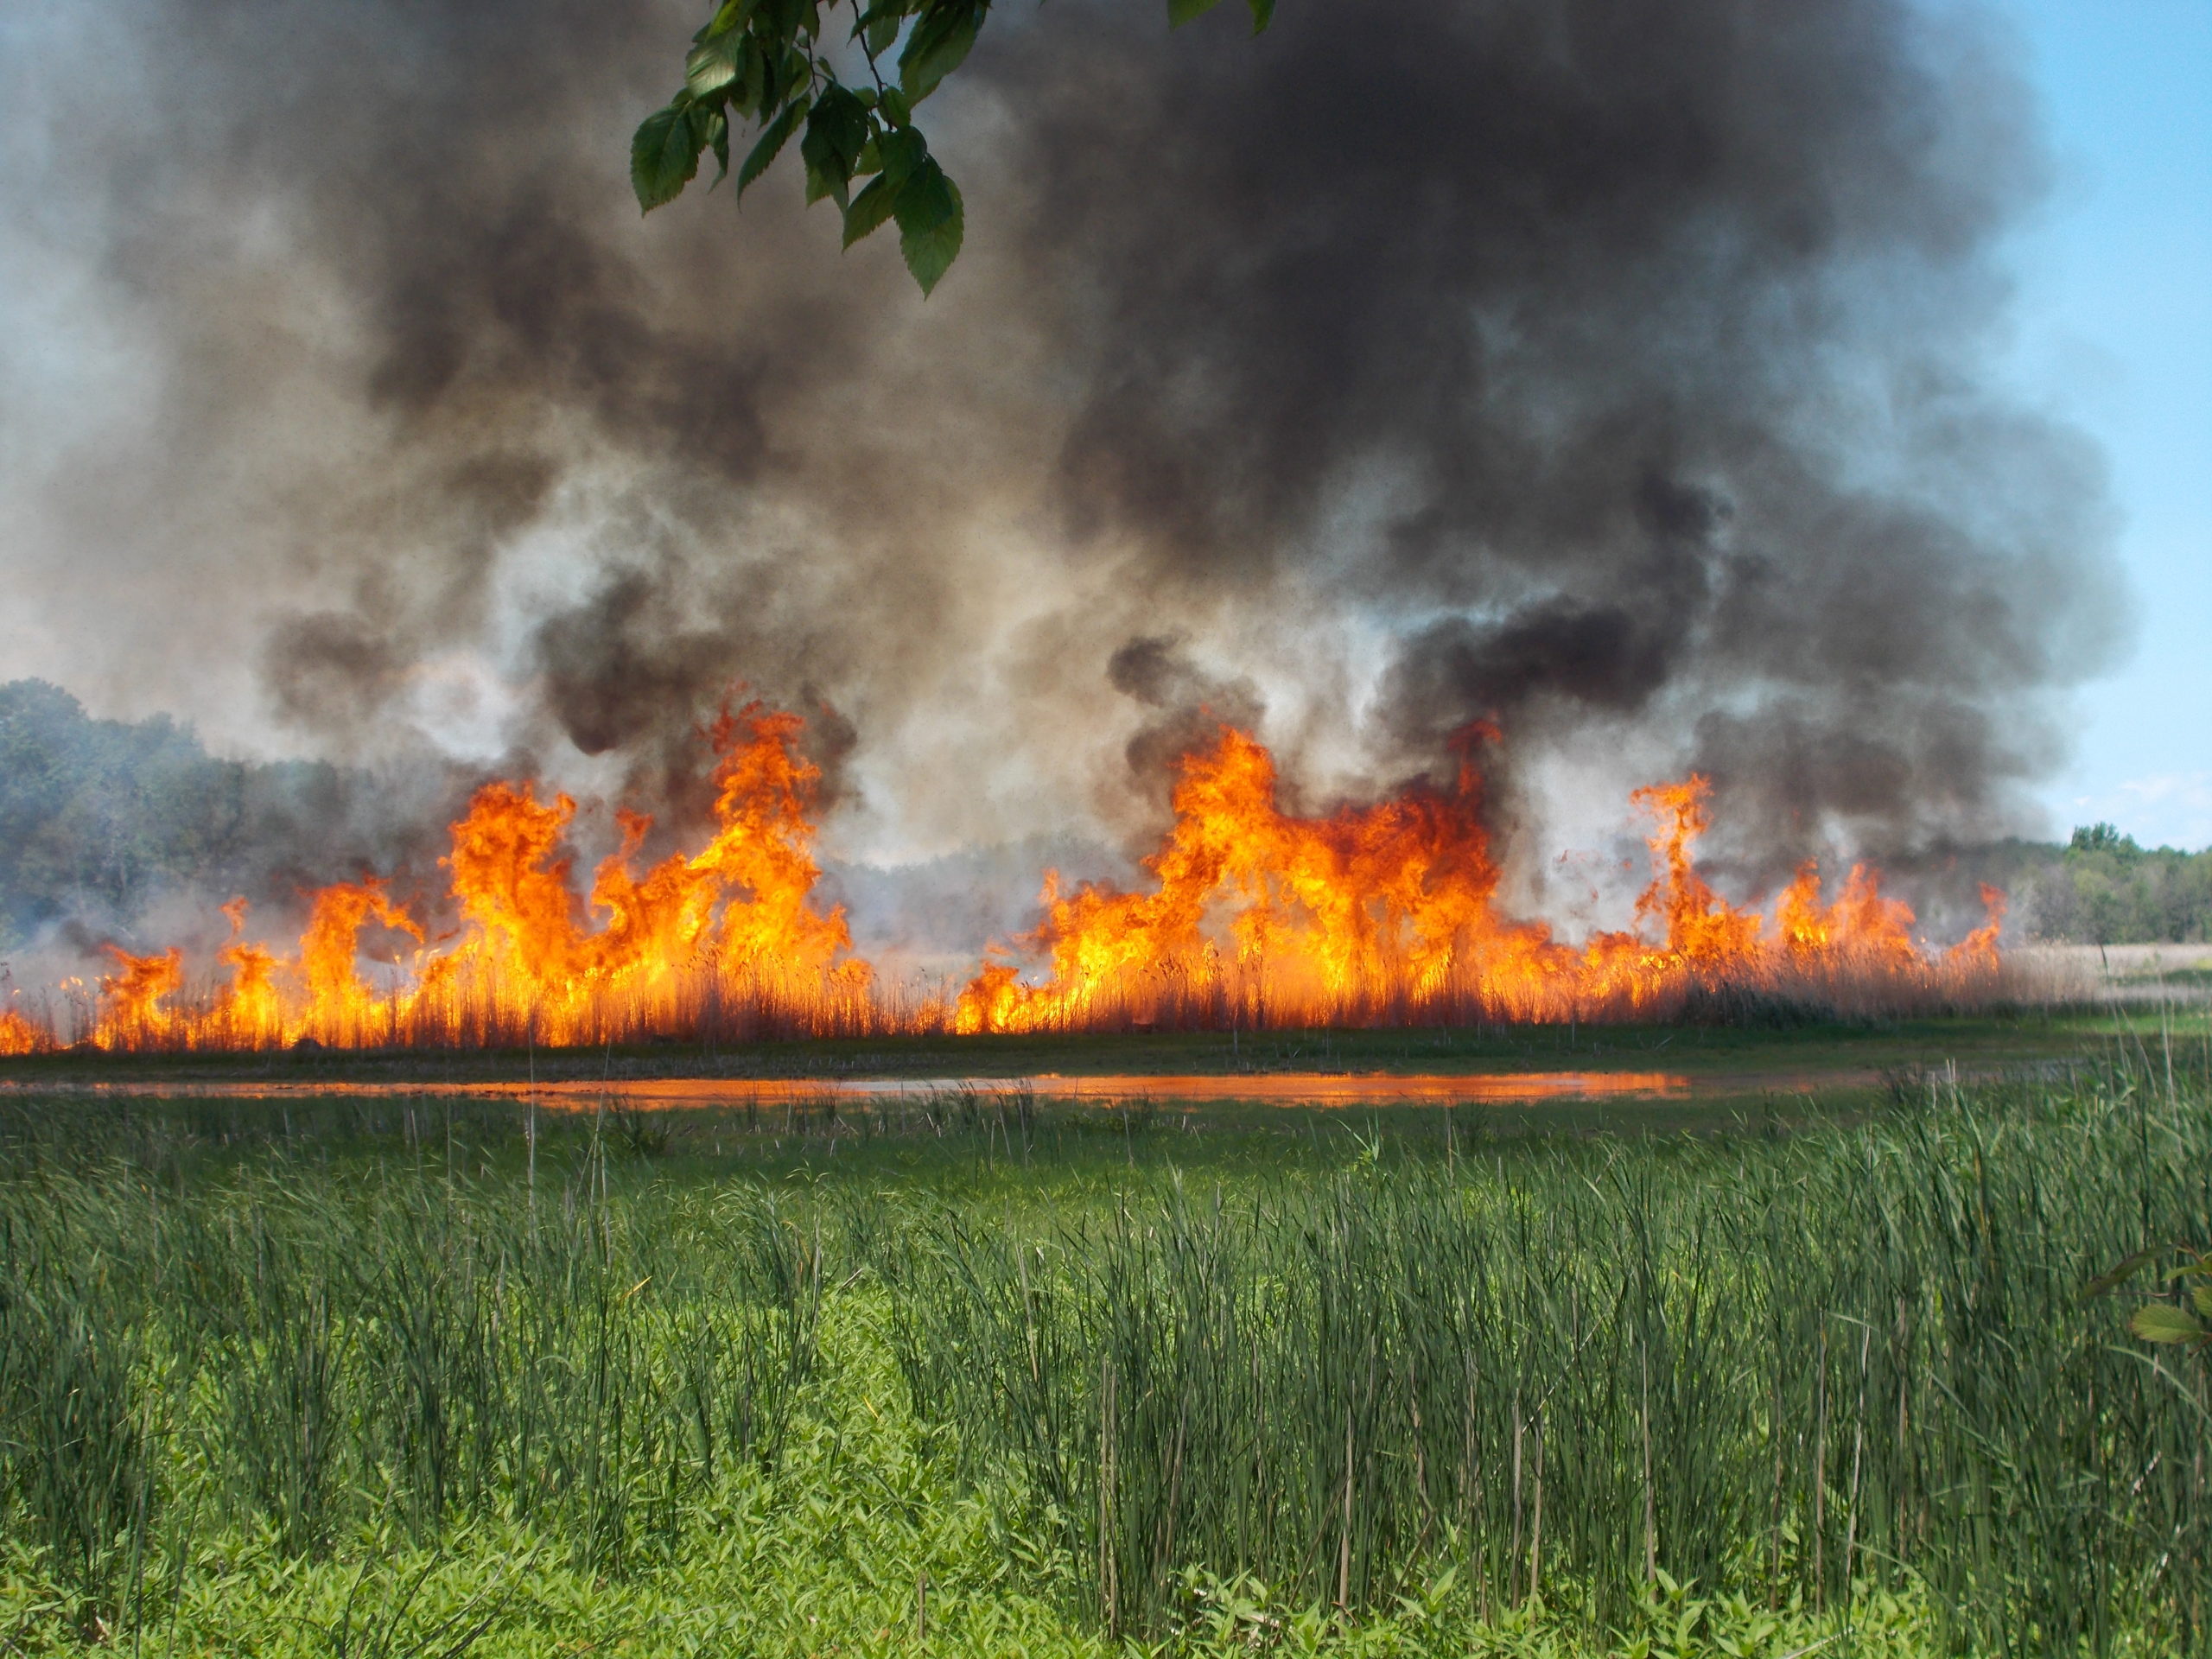
Prescribed fire
Prescribed fire, also known as prescribed burn or controlled burn, can be an effective tool for removing dead standing biomass of invasive Phragmites. This technique can be used as part of a comprehensive management program when proper permits and safety protocols are in place.
Continue Reading
Timing
Prescribed fires are generally done during the dormant phase of Phragmites when the aboveground biomass has died and begins to dry. Prescribed burns of live Phragmites stems are unlikely to catch and effectively remove the aboveground biomass.
Are there other management techniques used with this one?
Fire is not effective as a stand-alone management technique because it does not affect the root system and may stimulate growth and increase density. However, using fire to remove standing dead biomass can allow for more effective future treatments and can stimulate native plant regeneration. Ideally, burning should be conducted during the dormant season following herbicide application.
If prescribed fire is not feasible at a particular management location, different management techniques may be implemented that yield similar results, including mechanical and manual control.
Special equipment needed
Implementing a prescribed burn requires a lot of advance planning. Permits must be acquired from your local jurisdiction, special permissions are often needed from surrounding landowners, and managers must coordinate with the local fire department. Planning and implementation requires special training so prescribed fire professionals should be consulted to lead the burn. Contracted professionals will have the necessary fire control and safety equipment required.
Special considerations
Weather conditions can severally impact the outcome of a prescribed fire, particularly wind, humidity, temperature, and recent rain events. The amount of fuel (plant material built up) also needs to be considered. Duration and intensity of the burn will impact future management actions and must be planned accordingly.
Prescribed fires have the potential to create a lot of smoke that can impact nearby communities. Notices should be sent out prior to inform those who may be impacted.
Prescribed fires are a non-selective management action, meaning they impact more than just the target species being managed. Care should be taken to reduce impacts on flora and fauna within the burn area (in particular, animals that would not be able to move quickly from the area). Timing of the year and day can help reduce this risk and avoid critical reproductive periods.
Resources
- Scientific Report: The use of fire as a tool for controlling invasive plants (California Invasive Plant Council/USGS)
- Technical Report: Use of Fire to Manage Populations of Nonnative Invasive Plants (US Forest Service)
- Story Map: Michigan DNR Prescribed Burns
- Website: Michigan Prescribed Fire Council
- Website: Lake States Fire Science Consortium
- Website: USFWS Prescribed Burning Learning Module
- GLPC Webinar: Two-part Phragmites and Fire webinar series from the Lake States Fire science Consortium. Part 1 / Part 2
Video
In the video below, we feature the City of Ann Arbor, Michigan’s Natural Areas Preservation crew using fire to remove dead standing Phragmites biomass. Do you have lessons to share or questions about the use of fire in Phragmites management? Contact us or ask the Listserv!
Video acknowledgements: Thank you to the City of Ann Arbor, Michigan, and Natural Areas Preservation staff and volunteers. This video was filmed and produced by Reilly Manz, Great Lakes Commission.
This video is and content is for information purposes only. Permits and safety protocols for the use of fire in management are required and vary significantly by jurisdiction. The Great Lakes Commission, Great Lakes Phragmites Collaborative, City of Ann Arbor, and partner organizations are not liable for any loss, damage or other impacts resulting from this video or other any other management guidance.
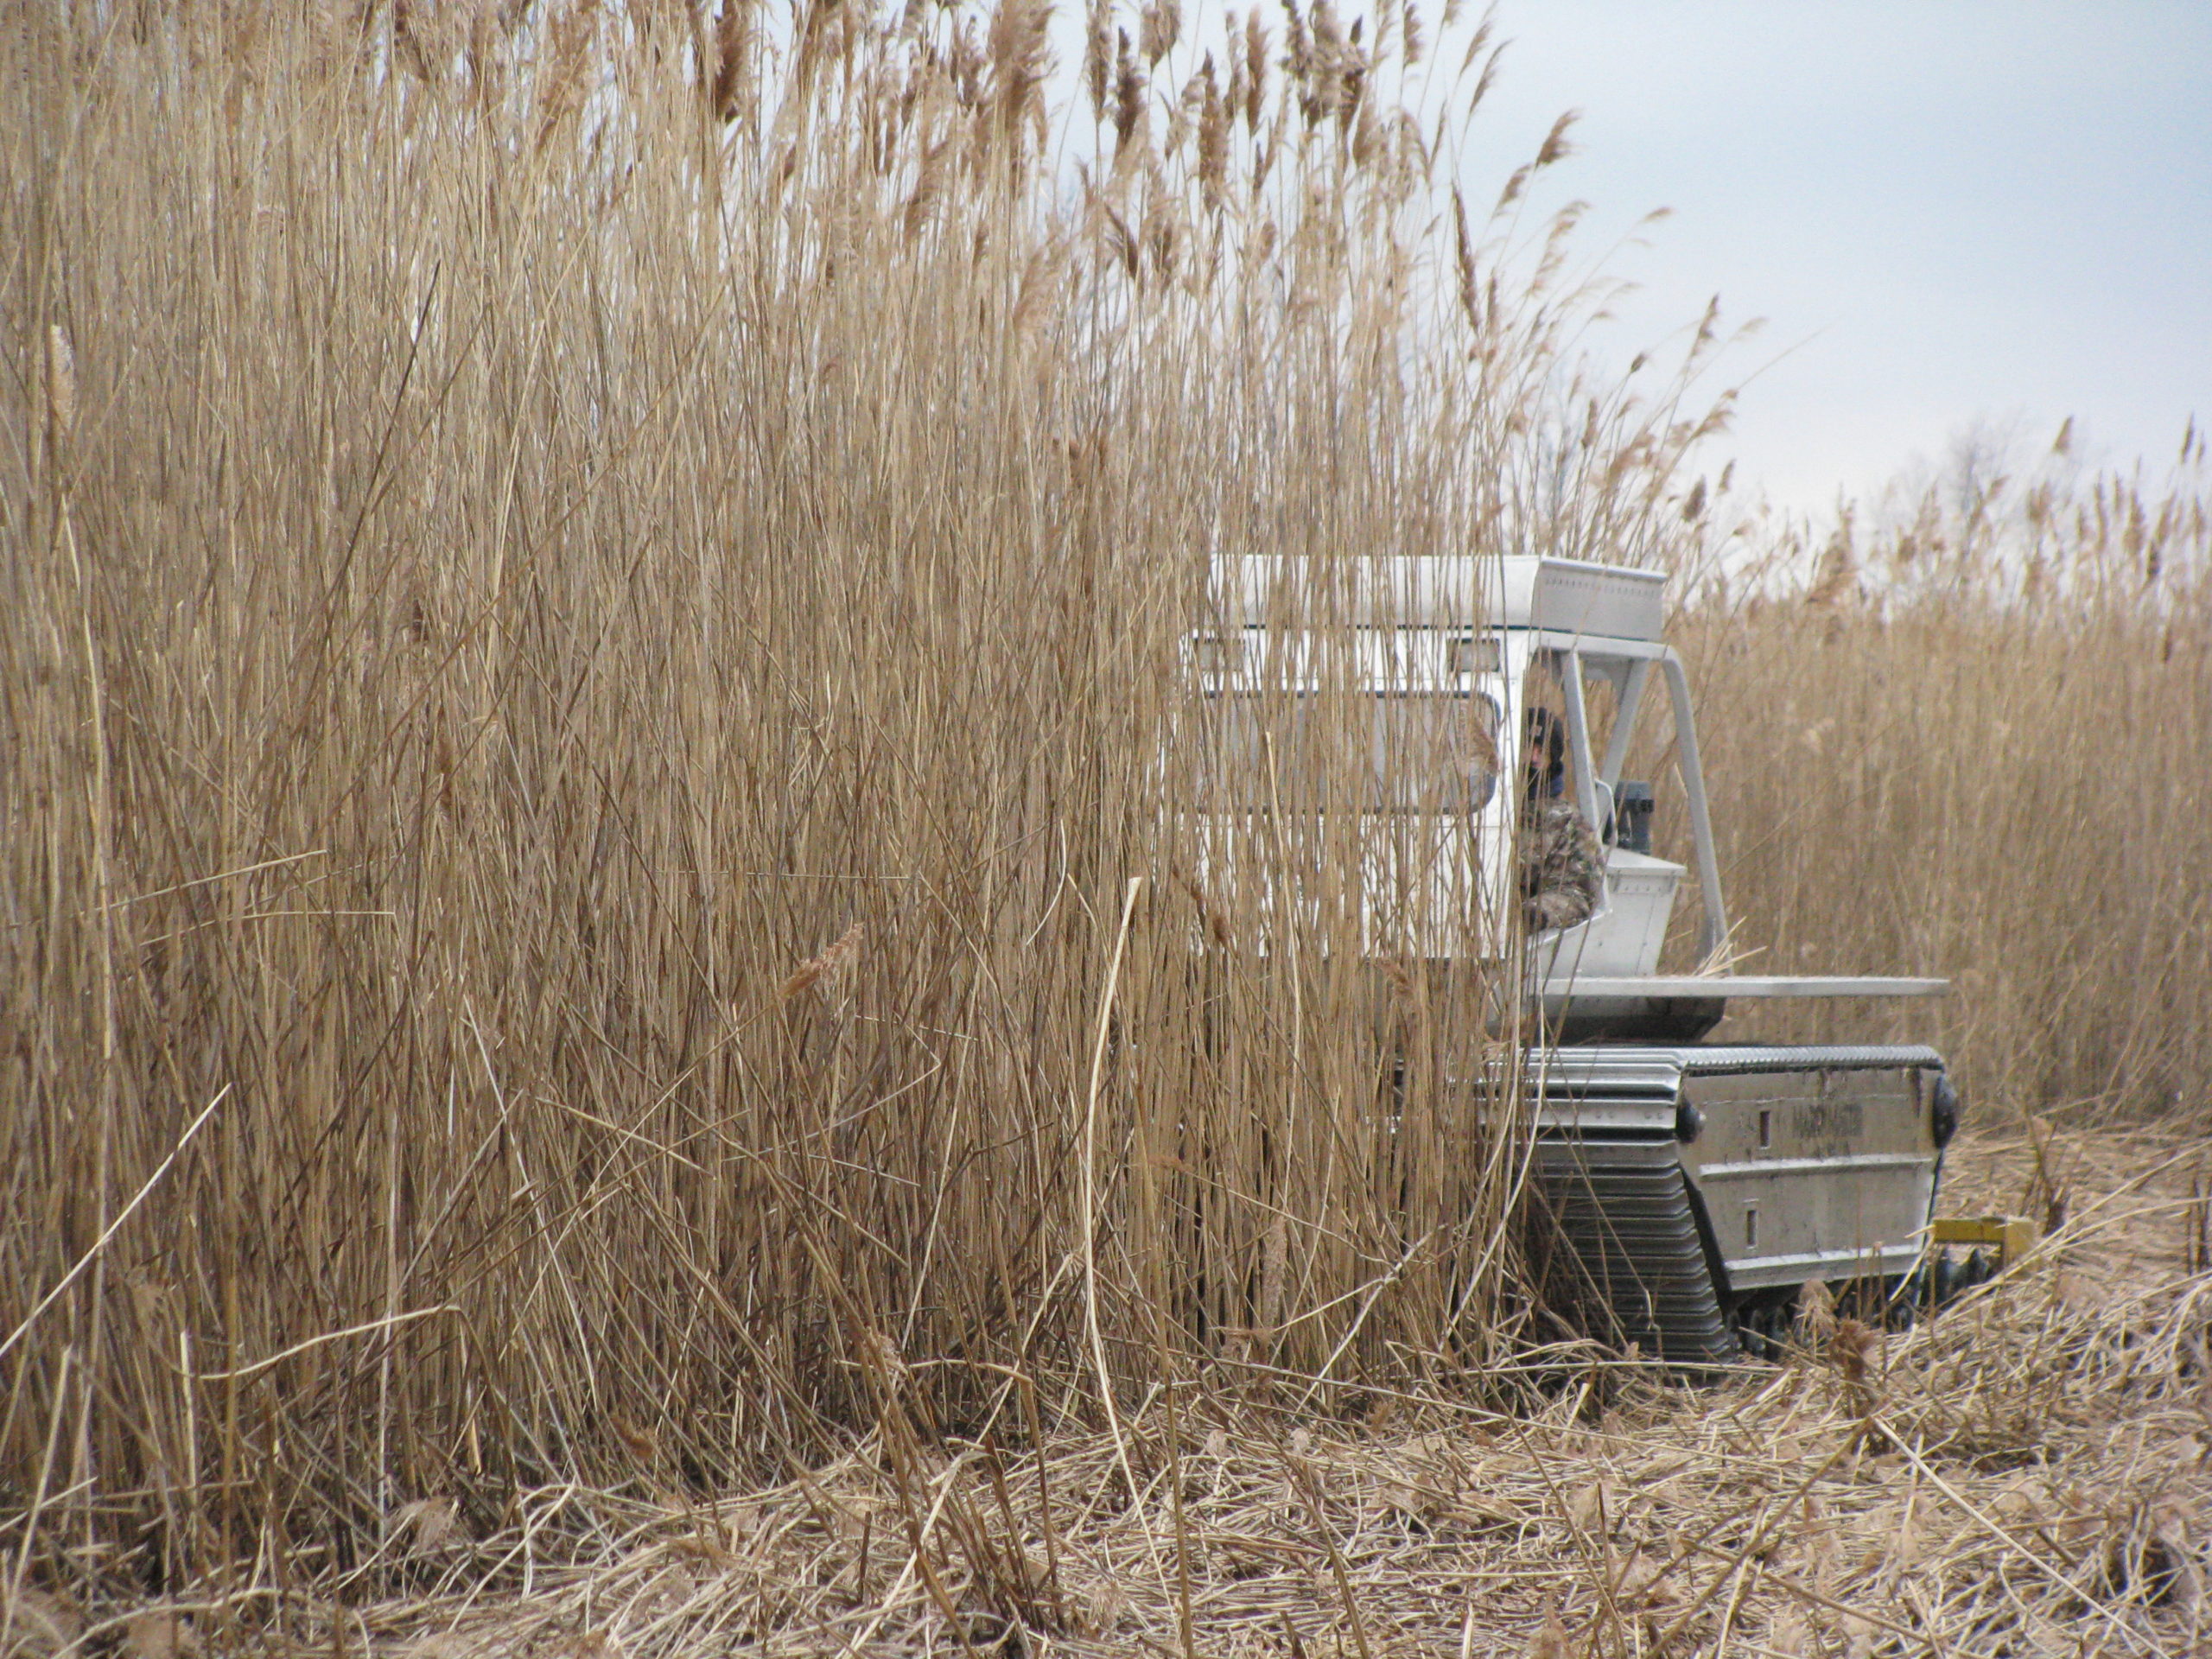
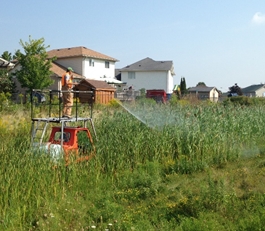
Mechanical removal
Mechanical removal is conducted through the cutting of Phragmites by large (e.g., Truxor, Marsh Master) or small (e.g., weed whacker) mechanical equipment. For this management technique, biomass can either be left on site or removed. Large equipment for mechanical removal is brought on site to facilitate plant removal and is typically helpful in situations with dense hard to access stands and can work as an introductory step or in tandem with other management options reducing both live and dead stems in stands.
Continue Reading
Timing
Mechanical removal can be utilized at any point in the year depending on the goals for the management actions and with consideration for timing of other management techniques. However, mechanical cutting and removal of Phragmites may be beneficial in early summer before seed heads have matured to prevent unwanted spread. If planned for use after herbicide application, it is recommended to wait for a period of two weeks or more before removal to allow for herbicide efficacy. Removing dead stems may allow for increased herbicide contact with the living Phragmites tissues when herbicide is applied with spray applicators, and can allow for easy spot treatment of new shoots in the spring and early summer. Mechanical removal is often used in the dormant period to clear dead and senesced Phragmites for future management.
Are there other management techniques used with this one?
When used in combination with other management techniques, mechanical remove can increase the efficacy of other management actions by removing dead stems and increasing access for future management at the site. It is frequently suggested as a follow up treatment after herbicide application, especially in areas where prescribed fire is not an option. Additionally, this management technique can be used prior to flooding with similar results to the cut underwater technique. Take a look at the Flooding and Cut Underwater techniques for more information on how these techniques may work together in the removal of Phragmites.
Similar to using prescribed fire, removal of Phragmites biomass by mowing or cutting is also not an effective stand-alone treatment method as it does not effectively treat the root system and may stimulate growth and increase density.
Special Equipment
Equipment used for mechanical removal can vary from light hand-held equipment like brush cutters and trimmers to larger vehicle sized marsh excavators or similar equipment (some of these are known from their brand names, e.g., Marsh Master, Marsh Runner, Truxor and more).
Remember: Any equipment used to manage non-native Phragmites should be cleaned of all debris (plant fragments, seeds, mud) before it is removed from the treatment site to prevent the unintended spread of seeds or rhizomes to other areas. For more information on cleaning equipment, see Ontario’s Clean Equipment Protocol.
The method for removal of biomass depends on site characteristics, including size of area to be covered and if soils can support large machinery used in the mechanical cutting and removal efforts. Impact of large machinery on erosion and wetland soils should be considered in the planning process.
Special Considerations
Different states, provinces, and localities may have different regulations or permitting requirements regarding mechanical removal. Check with local authorities first.
Special consideration should be given to the disposal of biomass from the site; unlike fire, mechanical removal may not remove the resulting biomass, which may shade out the native seedbed and prevent other beneficial species from growing. In addition, left behind biomass may contain Phragmites seeds and live tissue. Considerations should be made to correctly dispose Phragmites biomass to prevent further establishment and spread.
Resources
- Scientific Article: Carlson, M. L., K. P. Kowalski, and D. A. Wilcox. 2009. Promoting Species Establishment in a Phragmites-Dominated Great Lakes Coastal Wetland. Natural Areas Journal 29(3), 263-280.
- BMP Guide: The Mechanical Treatment section of “A Guide to the Control and Management of Invasive Phragmites” (pages 17 & 18)
- BMP Guide: The Mowing Treatment section of “Invasive Phragmites – Best Management Practices” (page 10)
- BMP Guide: USACE Phragmites Best Management Practices
- Protocol: Ontario’s Clean Equipment Protocol
- Blog Post: Removal of Biomass, blog post by Kimberly Bourke, U.S. Geological Survey Contractor
- Case Study: Underwater cutting in Ontario

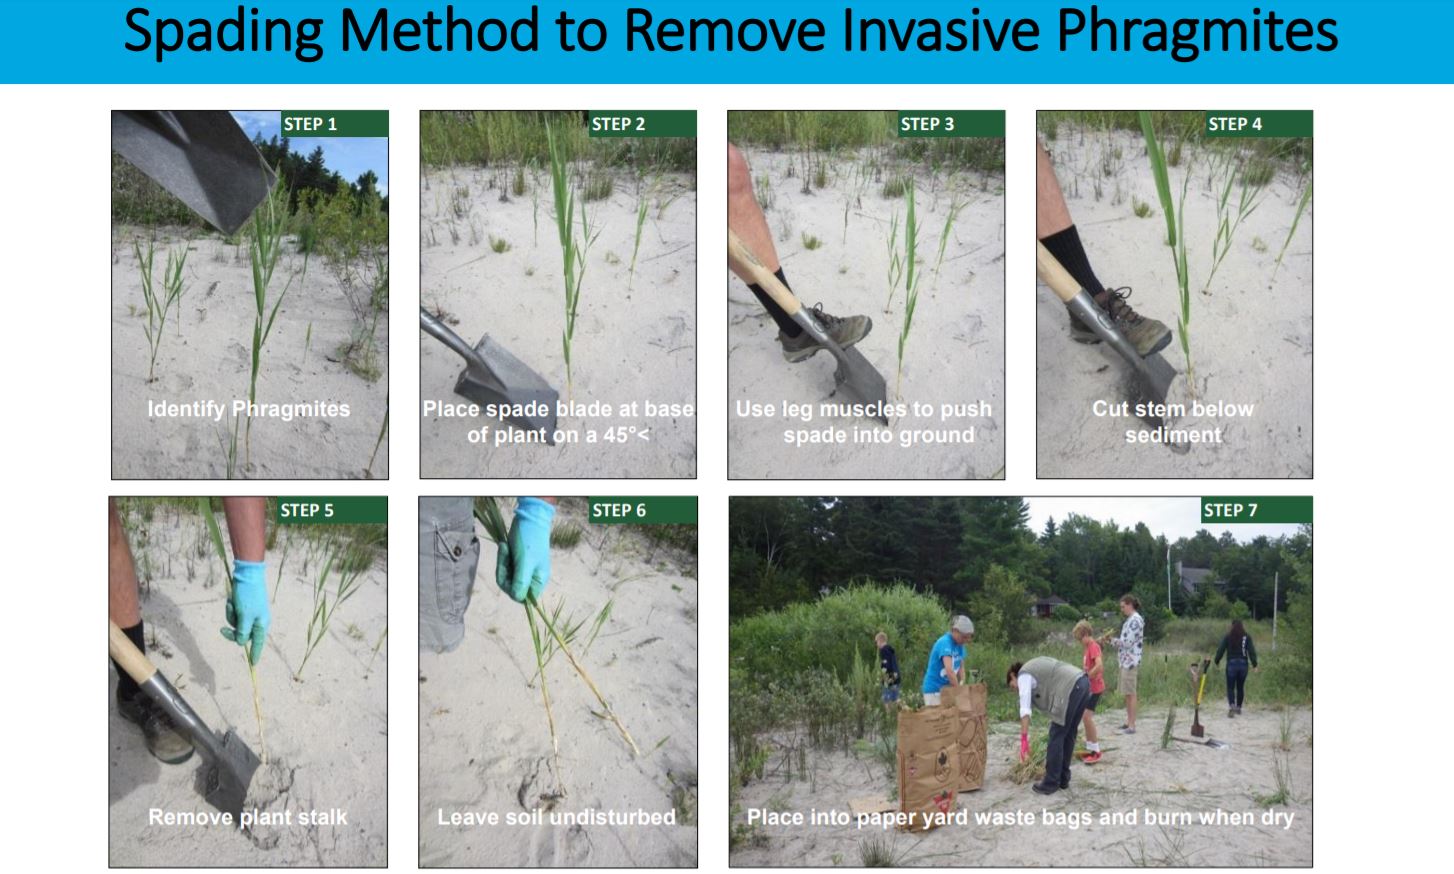
Manual removal
For small stands of Phragmites, manual removal may be possible if there are many hands to help with the work. It can be a viable option for small infestations where managing with herbicide is not possible. Cutting stalks above the soil surface is not effective – Phragmites is a grass and cutting can actually stimulate growth. ‘Spading’ is a technique pioneered by Lynn Short on Georgian Bay that severs the stem at a 45-degree angle below the soil surface to remove the primary shoot and the newest bud of the plant. This forces the rhizome to expend more energy to generate secondary shoots, which are then spaded as well. The goal is to continue spading until the rhizomes have been exhausted and the plant dies. This method can be effective in small patches with loose soil or sand substrate, and even underwater. Because individual stems are severed, non-target effects to flora and fauna are minimal with this technique. Spading multiple times over the season reduces Phragmites stem density, freeing up available space and light for other vegetation, increasing plant diversity. Spading is very time-consuming and is not recommended for widespread infestations.
Continue Reading
Timing
According to preliminary reports, spading is best performed several times during the growing season as new shoots appear. The technique is most effective when performed three times, once in June, July, and August, but if spading can only be performed once the best time is when the Phragmites reaches its maximum height and starts to produce seeds. If plants are producing seeds, it is recommended to remove seed heads with garden shears and bag them prior to spading to reduce the spread of seeds across the work area. Spading may need to occur annually for 3 to 5 years to continually weaken the rhizomes.
Are there other management techniques used with this one?
Removal of previous years’ dead standing biomass by mechanical removal during the dormant phase is helpful in preparing a site for spading during the growing season, so new shoots are easily accessible.
Special equipment needed
This technique requires no expensive equipment, only simple spades. Sharpening the spade tips makes cutting underground stems easier. If seeds are present, you may need garden shears to remove and dispose of them prior to spading.
Special considerations
Labor (many person-hours may be required), proper disposal of cut material.
Resources
- Quick Guide: OPWG’s Quick Guide to Spading
- Protocol: The Land Between’s Invasive Phragmites Removal Protocol
- Technical Report: Managing Phragmites with Volunteers: Assessing the Efficacy of Citizen Scientist Volunteers Employing a Manual Spading Technique on Invasive Phragmites
- Technical Report: Lynn Short’s report on spading – Phase 1
- Technical Report: Lynn Short’s report on spading – Phase 2
- GLPC Webinar: Lynn Short’s spading presentation
How-to Guide and Video
How-to Guide to Spading
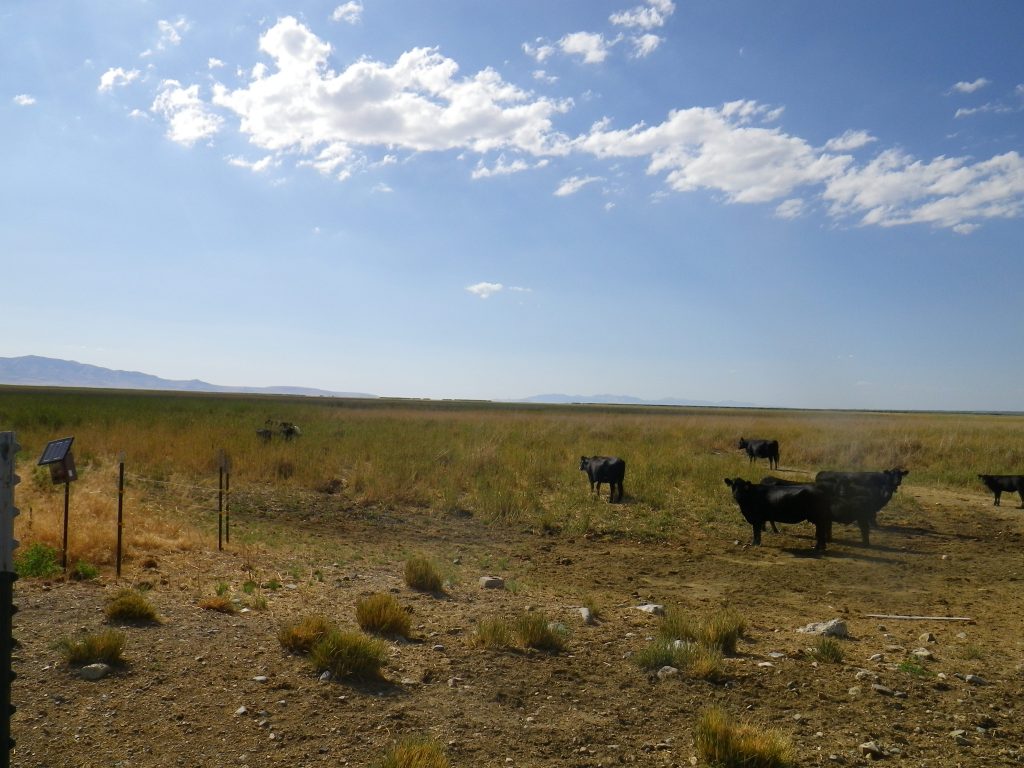
Grazing
Research suggests that high intensity rotational grazing performed over short periods of time by cattle, goats, horses, and water buffalo can reduce non-native Phragmites biomass and increase plant species diversity in wetlands. Trampling of dense Phragmites litter by livestock may also speed decomposition and increase light availability for other plant species. While popular in Europe, there is limited support for this method in the United States, but it is an active area of research. U.S. studies have found that grazing may take several seasons to effectively reduce Phragmites biomass and is considered a tool for Phragmites suppression–not eradication–unless paired with other techniques such as herbicide application. Grazing does not usually directly impact the rhizomes (unless severed by hooves) and grazing at the wrong time of year may have little impact on Phragmites. Other issues include possible changes in nutrient cycling, negative impacts on remaining native plants, and physical disturbance of fragile systems. Livestock grazing may be an effective suppression strategy when these conditions can be met: 1. water, if present, can be drawn down, 2. livestock can be contained in high-density Phragmites areas and don’t have access to native plants, 3) the area to be grazed is not sensitive to increased nutrients, and 4) grazing can be incorporated into a long-term management plan.
Continue Reading
Timing
The growing season (May-July) is the best time to use grazing for two reasons: it is the most effective time to limit further Phragmites growth and spread, and it is when the plants have the most nutritional value for livestock. Feeding during the growing season removes the new shoots and young leaves, altering plant development. It also breaks the yearly nutrient storage cycle between aboveground biomass and the rhizomes: loss of new foliage removes the energy that had been stored in rhizomes to promote the consumed spring growth, and altered growth patterns caused by consumption (e.g., reduced leaf area) prevent more nutrients from being stored in the rhizomes later in the season. New shoots and leaves have more digestible dry matter that livestock prefer over secondary growth.
Grazing does not need to be performed during the entirety of the growing season to be effective; a couple of weeks of high intensity rotational grazing may be all that is needed per season and works better than year-round, non-targeted grazing.
Are there other management techniques used with this one?
Mechanical removal of biomass provides similar outcomes but may be more costly and labor-intensive than grazing. Mechanical removal may be a better method to use if the area being managed may be sensitive to possible increased nutrient inputs from livestock. In some cases, it may be advantageous to combine mechanical removal and grazing (see below).
Use of grazing by itself reduces Phragmites biomass but does not remove the plant entirely. If eradication of Phragmites is the goal of management, grazing can be used in coordination with other techniques. The Utah State University Extension recommends the following management regime in their guide to cattle grazing on Phragmites: 1) mow the first year of management, 2) draw down water (if present), 3) allow cattle to graze before Phragmites goes to seed (May-Sept), 4) wait 2-4 weeks, then reflood (if possible). If these techniques are not working as needed, herbicides can be applied between steps 3 and 4.
Special equipment needed
Electric fencing is needed to contain livestock in Phragmites-dense areas. The ability to draw down water is also needed if livestock are expected to safely access wetland plants. To improve efficacy, livestock that are familiar with consuming Phragmites should be chosen for the job, as it is not often an inherently preferred food item. Animals that are also familiar with navigating wetlands/water/mud should also be considered if the soil is unstable. Supplemental diet items may be needed if Phragmites digestible dry matter content is not high enough for the livestock species used (e.g., cattle).
Special considerations
Permits, land permissions, coordination with livestock owners, and consideration for non-target effects such as habitat susceptibility to impacts caused by excess nutrients or soil compaction.
Resources
- Factsheet: 2019 Guide to cattle grazing published by Utah State University Extension
- Open Access Scientific Article: Livestock as a potential biological control agent for an invasive wetland plant
- Open Access Scientific Article: Cattle Grazing Effects on Phragmites australis in Nebraska
- GLPC Blog post: Utah State University cattle grazing research
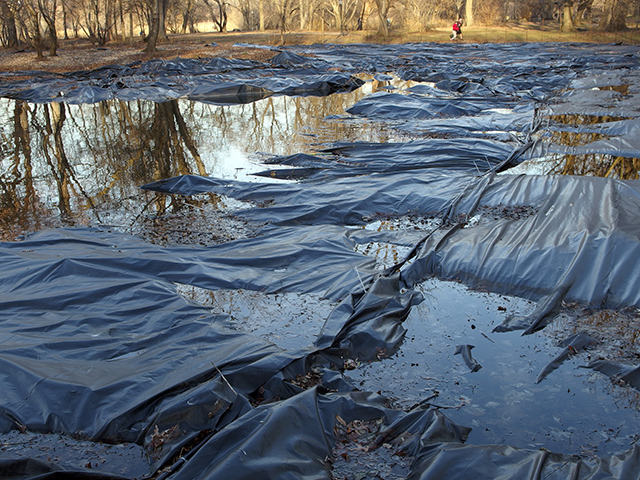
Smothering/tarping with black plastic
Covering cut or burnt Phragmites with thick black plastic during the growing season can be effective in limiting the growth of small-scale infestations, although very few published studies support this method. High heat and lack of light will eventually kill the plants beneath the plastic and prevent regrowth. Because this method is time- and resource-intensive and logistically difficult, it is most effective in small areas exposed to direct sunlight. This method may be of use in delicate ecosystems with small stands of Phragmites where the use of herbicides could be difficult or impossible due to permitting issues. However, the areas covered with plastic also are not suitable for native plant growth and thus this method can reduce habitat for various wetland species. Phragmites is also capable of sending runners or rhizomes out from beneath the plastic to establish new plants outside the treatment area. This method is not considered viable for treating large stands.
Continue Reading
Timing
In a 2013 study, researchers cut Phragmites before covering with black plastic and found that the method requires at least two years of intermittent applications to be effective. They recommended cutting the Phragmites in June, as it is the time when the plants have fewer carbohydrates stored below ground in rhizomes. Plastic should be placed on top of cut stems as quickly as possible to prevent initial regrowth of stems. Plastic 4-6 mils thick can disintegrate within 8-10 weeks of exposed sunlight, so treatment length should consider the lifespan of the plastic used. In the aforementioned study, plastic was left on the treated area for several months, but another study suggested that only 4-5 days of treatment may be needed to kill the plants, at which time the plastic could be rolled away and brought back again for another treatment if needed later. Short-term applications would likely extend the lifespan of the plastic.
Are there other management techniques used with this one?
Tarping is most effective when aboveground biomass is first removed by cutting or burning.
Special equipment needed
Thick plastic is needed to withstand the sunlight and environmental conditions, and thicker plastic (>6 mils) may be warranted if application times will extend past 8-10 weeks. To pretreat the site, cutting equipment (e.g., mowers, weed whackers) or crews to perform controlled burns will be needed.
Special considerations
Size of treatment area, methods of keeping plastic in place (stakes, sandbags, bricks, etc.), permits for biomass removal pre-treatment, native flora and fauna in the treatment area, and disintegration/fracturing of plastic with long treatment times (more than a couple of months).
Resources
- Master’s Thesis: Response of Phragmites australis to Black Plastic Treatment
- Technical Report: Results of Burning, Cutting, and Covering with Plastic in a North Carolina Salt Marsh
- Technical Report: Comparison of Restoration Techniques to Reduce Dominance of Phragmites australis at Meadow Pond, Hampton New Hampshire
- News story: Large-scale tarping effort in Maryland
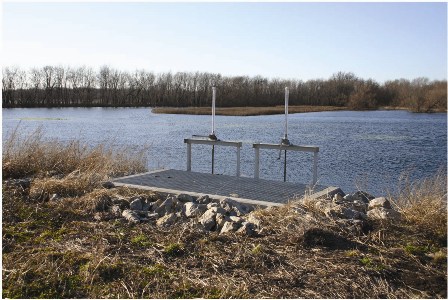
Flooding
Flooding cut or burned stands of Phragmites can be used as part of a multi-method management approach in wetlands where managers have control of water levels. Managers often use this approach in wetlands with installed water management systems such as dikes. Similar to cutting underwater, when Phragmites is fully flooded underwater, the plant cannot get the oxygen it needs and eventually dies. Therefore, it is important that when flooding a stand of Phragmites, the entire stand is fully underwater. As long as part of the plant is above the water’s surface, it can maintain convective gas flow and obtain the oxygen necessary for survival. Phragmites can typically survive flooded conditions by sending up leaves/stems above the waterline, also called “snorkelers”, which allow the plant to maintain healthy oxygen levels. This means in order for a flood to be effective, water levels must be high enough that “snorkelers” cannot break the water’s surface. If the plant is just barely submerged, there is the risk that there are still enough reserves in the rhizome for the plant to continue to grow and extend itself out of the water. Additionally, since clonal stands of Phragmites are connected belowground through their extensive rhizome network, the entirety of the stand should be flooded to ensure that no portion of the stand is “rescuing” the flooded plants by potentially facilitating oxygen transport.
Continue Reading
The amount of water needed to cover Phragmites in a flood is debated. The Ontario Ministry of Natural Resources suggests that water levels be maintained at a minimum of 1.5 meters (~5 feet) above the Phragmites stand, although shallower water depths are likely to still be effective as long as all parts of the plants remain submerged. The duration for an effective flood also varies from source to source. The Ontario Ministry of Natural Resources suggest that flooding should last at least 6 weeks, while others suggest that the duration for an effective flood can vary largely due to the clarity of the water. For example, in clear water, it may take 1-2 weeks before the plant becomes stressed, but in very turbid water Phragmites may die in a matter of days due to reduced light reaching the plant. When planning an intentional flood, regardless of water clarity, it is best to err on the side of caution to ensure time for the plant to fully die and flood Phragmites for at least a month. Flooding is one of many management techniques included in the Phragmites Adaptive Management Framework (PAMF).
Timing
Flooding is most effective during Phragmites’ growing phase (mid-spring to late summer). In spring, Phragmites is at its most vulnerable having spent all winter using up its stored carbohydrates and therefore an ideal time to begin management.
Are there other management techniques used with this one?
Flooding is often combined with other management techniques to boost the effectiveness of the treatment. Herbicide application, mechanical removal, and prescribed fire are all common management actions that may take place before a flood. If combining with herbicide treatment (conducted on dry land), flooding and any pre-flood biomass removal should be done a minimum of 3 weeks after glyphosate treatment to allow for the active ingredient to translocate to the root system. Depending on how high water levels can be raised, mechanical removal of Phragmites may be a necessary step before planning a flood to ensure the entirety of the patch is kept underwater. With any type of mechanical removal, all cut stalks should be collected and disposed of properly to prevent further spread. The management technique cutting underwater provides similar outcomes to flooding.
Special equipment needed
A pre-installed water management control system is necessary to utilize this management technique. To cut Phragmites beforehand, a variety of equipment can be used depending on the size of the patch. For small patches, hand-held equipment like brush cutters and trimmers may be adequate. For large, dense patches, marsh excavators or similar equipment (some of these are known from their brand name, e.g., Marsh Master, Marsh Runner, Truxor and more) are better suited.
Special considerations
Different states, provinces, and localities may have different regulations or permitting requirements regarding water level manipulation. Always check with local authorities first. If any type of mechanical removal occurred before flooding, all cut material should be properly disposed of following the rules of your local jurisdiction. Flooded sites should be monitored throughout the growing season as any emerging stems will need to be removed using a selective cutting method. Water drawdowns in early summer may increase the habitat available for non-native Phragmites and lead to expansion of the plant.
Resources
- GLPC Webinar: Learn more about why what makes flooding an effective management technique by watching the presentation Phragmites snorkeling: How does it survive water level fluctuations by Dr. Brian Sorrell.
- Case Study: Detroit River Western Lake Erie-Cooperative Weed Management Area